Showing posts with label Mini vci j2534. Show all posts

Thursday, March 30, 2023

How to Configure Vediamo with Mini VCI Cable?

 How to configure Vediamo for J2534 Devices (Here mini vci j2534 specifically).

If you do not know what anything in the title means, you probably should not try anything on this post.

Notes:
1. We will not be providing a link to download Vediamo or any J2534 products, just explaining how to configure the program settings in order to connect to your car.
2. Vediamo is a programming software that allows you to edit the code within the different onboard computers.  This post will only focus on configuring a certain cable – Mini VCI J2534 with the program.

3. You are at your own risk. We are not responsible for the damage.

configure Vediamo with Mini VCI Cable

STEP 1.
Get an activated version of Vediamo 4.2. HAS TO BE 4.2 otherwise you will not be able to configure a J2534 device like openport2.0 or MVCI with the program. You can find links to cracked versions on MHHAuto or you can buy a copy on ebay with a keygen for around $10. Not sure how trustworthy ebay is.

We have explained why only Vediamo 4.2 can be used with j2534 and how to configure 4.2 with openport in the previous post.

How to Configure Vediamo with OpenPort 2.0?

STEP2.
Buy a Mini VCI cable. I got mine on for less than $30. Spend as much or as little as you would like in order to make yourself feel comfortable with attaching it to your benz.

STEP3.
Plug in your MVCI and download any necessary drivers. If your computer recognizes it in Device manager as “Serial bus converter” then you do not need to use any install disk that came with the cable. It will be in Device manager – Universal Serial Bus controllers. There should also be another tab in device manager that says “Serial ports” and have your device listed along with “(COM3)”. Make sure it is COM3, otherwise you can right click, go to properties, and change to COM3.

STEP4.
Download Autokent MVCI MultiDriver x64 2.0.1. This can be found online (search our blog), you will have to turn off threat/virus protection in order to get it to work. Go through the install process and run the application as admin. The Splash screen should be a picture of a dude holding a gun with the words “Autokent” across the bottom. When prompted, select 2.0.1 from the dropdown menu and install.

STEP5.
Now comes the configuring part. Open your Vediamo file location (probably C:->ProgamFilesx86->Vediamo.
Then go to Caesar->driver, and right click on “slave”. Go to properties, security tab at the top, edit, add, and then type “everyone” in the box, and select check names on the right side. Then check off the boxes to allow everything. This will allow you to edit the file.

STEP6.
Open the “slave” file, scroll down to the “Part J” section. Under the “Device name:” section. Change whatever is inside the quotes to The name of the autokent driver you previously installed. The name should be “XHorse – MVCI Autokent-X64 – 2.0.1”. But, to be sure, you can find the driver name in Registry editor (Windows button, regedit). The location of the driver may be different, but you can find it by going to HKEY_LOCAL_MACHINE -> SOFTWARE and then doing ctrl+f and searching for “Autokent” and finding the next instance. You can then right click on the folder with that title, click rename, then ctrl+c to copy it exactly and paste it into the part J configuration device name in slave.ini. Save the slave file and close.

STEP7.
Open Vediamo start center, on Vediamo Server, select update. Uncheck all the boxes except for “Part J” and “Pinmapping”. Select Update. If prompted, select the Autokent MVCI driver from the dialog box as your part J. When working correctly, you should have a box that says “Part xxxxx” with some number as the x’s underneath the Vediamo server box.

STEP8.
Select the notepad icon 2 from the left at the tools window on the bottom right of the start center. Select Ecoute options -> format of the variant code string -> change decimal to hex.
Everything should be properly set up now. You will need to have the proper .CBF files (look up vediamodata downloads) and from there you can find youtube videos on the possibilities for working on the computer modules on your car.

IMPORTANT NOTE – When connecting to your vehicle, there will be a tab at the top left that shows a connection icon. It will default to saying “KLine1 Communications”. Right click on this, select properties, and then from the dropdown menu, select CANHS. You will have to do this every time otherwise you will not be able to connect to your car properly.

Wednesday, March 1, 2023

Download Driver for Mini-VCI J2534 on Win 10 x64 bit

 I recently purchased a Mini-VCI J2534 cable from obdii365 for future car improvements.


Although the site was listed version 18. I do not need this program, just for information.

I encountered such a problem that in the disk "MVCI Driver for TOYOTA.msi" the driver was only for 32-bit Windows OS, and I have Windows 10, x64 bit installed on my laptop.

I searched for a driver on the Internet for a long time and came across one, where he left a link to the desired driver and thanks to him for that!
mini vci j2534 driver

Download "Mini-VCI-Setup.exe" and run, the installation is standard. After installation, this cord appeared in the MMCodingWriter settings and connected to the car without any problems.

Wednesday, October 12, 2022

How to Repair Bricked Chinese Mini VCI?

 Here is the customer DIY solution for those who bricked their mini vci j2534 interface after using Firmware update tool.

mini vci j2534 cable

SOLUTION:
STEP 1: Download the hex file attached.
STEP 2: Download Flash Magic (used version 13.20)
STEP 3: Connect the mvci device to an USB port
STEP 4: Open Flash Magic, select LPC2119 (LPC2000) in the field device
STEP 5: Select the serial port: i.e serial port COM3, try to remove the mvci device and plug it again to see if the FlashMagin detects the COM port automatically (maybe is better to remove all others USB devices during the process (my case))
STEP 6: Baud-rate: I selected 38400, but maybe other (lower) can provide a secure flashing.
STEP 7: In the Firmware panel update the .hex file.
STEP 8: Press the giant button START. The flashing should start, it takes a while (2 min aprox. for me, I read others could take 20 min)
STEP 9: When Flash Magic get out of the busy state, the process is finished, close the software and remove the device of USB port.

To confirm that it was restored to 1.4.1 version open the Firmware Update tools and check the firmware version.

Free download mvci-MVCI006000001


  1. Be sure your device is connected and recognized by the computer. Try connect to your computer with driver FDTI FT232 (be sure your system is 32bits or 64bits). (MVCI J2534 china clone use this driver https://www.ftdichip.com/Drivers/D2XX.htm)
  2. Once connected, easily will be recognized by Techstream in Windows 32bits. For 64bits, you need search online
  3. Save your current firmware with FlashMagic (Read & Save) before updating
  4. Update Hex firmware 1.4.1 (attached compressed file, unzip the entire folder with 7zip or whatever unzip program)

NOTE:

FlashMagic access to LPC2119FBD64 microcontroller from MVCI J2534 selecting LPC2119 (LPC2000) in the field device. If FlashMagic don’t read your device, probably you have to open it to identifier the microcontroller type.
If the MVCI clone is built on a fake FT232R chip, it is possible the installation of fresh drivers has reset its EEPROM.
Years ago FTDI released a driver (2.11.0 and 2.12.0) that bricks chips that it believes to be counterfeit. What it did was to set the PID (Product ID) to 0000 instead of 6001 which renders the chip unusable as Windows cannot find a driver for it.
There are many post how to identify fake FT232R chip and how to fix it.

Once you are sure your device have PID 0000, one of the solutions is flash it with the attached archive that contains an ept file using “FTDI Mprog 3.5

ft232r_eeprom


Feedback:
1). The drivers are ok.
I have 2 other white/transparent MVCI devices:
– cheap one  firmware v1.4.1
– full chip one firmware v2.0.4

Both work fine without any problems.
I even have the impression that the cheap one works better then the Full Chip MVCI.

2).

This worked. I was able to flash the .hex file using FlashMagic, and the dongle connects to the truck. I had previously flashed to 1.4.8, and then back to 1.4.1, but using the “official” firmware, not the clone firmware, while trying to use this on 64bit Windows. After flashing back to your 1.4.1 image, it works great. I’ll stick with my 32 bit Windows 7 image for now.
3).

I tried to recover my dead Chinese MVCI cable with mvci-MVCI006000001.hex file.
In my case, I need put LPC2119 to ISP mode before flash with the file.

To this, I figured out just short holes on P2 of the PCB when connecting USB.
  

fix bricked mini vci j2534 cable 1

LPC2119 entering to ISP mode if successfully, LED keeps green. (fig2)

fix bricked mini vci j2534 cable 2

I think it is successfully flashed my dead MVCI cable with the hex file.

fix bricked mini vci j2534 cable 3


In a nutshell, there is no reason to try to update firmware. Interfaces with 1.41 will be bricked if you try to update firmware.

Wednesday, August 5, 2020

Mini VCI Toyota Techstream V14 Setup on WinXP 32BIT

Here's the customer feedback on setting up Mini VCI Toyota Techstream V14 software on Windows XP 32bit system.

"I finally got it to work.   I had to use the Techstream 14 files and use the 32bit patch as a connection button. 

For Windows XP 32bit:
1. Install "Techstream_GTS_14.20.019_NDSI"

2. Install "Mini VCI Driver for TOYOTA"

3. Copy and Paste "Techstream Patch 32bit" & place it next to your Techstream Icon on Desktop

4. Hook MINI VCI J2534 Cable to vehicle OBDII port and computer

5. Turn car key to "On" position, lighting up dashboard

6. Start MVCI Firmware Update Tool

7. Start Techstream Software

8. First try connecting to vehicle byway of Techstream software

9. If unsuccessful, try connecting byway of clicking "Techstream Patch 32bit"

10. If #9 is successful, always use it as your connection icon 

Monday, April 20, 2020

Techstream Software Version & Required Adapter

Best I can tell the only XHorse interface firmware version that I used that worked with it is mini vci cable 2.0.4, these are cloned versions of Techstream and the XHorse cable interface, the real Toyota Techstream costs nearly $2000.

Using Techstream 12.30.017 (newest: v14.20.019) with the cheap Mini VCI Cable J25345 over here (Firmware 1.4.1) on a HP-Zbook with Windows 10-64bits prof.
Installed it using the 64bit for Windows 7/8 instructions previously mentioned and on
blog.obdii365.com
mini-vci-16-pin-cable

You can actually check all stages of the installation without connecting to the car:
First make sure to follow the unpacking/copying instructions in the 64-bit installation instructions before plugging in the cable in the USB port. When installed correctly you should be able to run the firmware update tool to check the firmware. Just do NOT update, only use it to see if the cable is recognized and reports back its firmware version + “connected” status.
If this is OK then at least your interface should be installed correctly, showing a red LED in the process.
Then install Techstream and apply the registry fixes (either manually or by the downloadable registry mod file), also previously mentioned. You can also manually point the original Techstream interface entries in the registry (same location) to the same Xhorse files just to be sure. These settings point Techstream to the correct location of the XHorse driver used for the MVCI Cable.
Also do not forget the TISFUNCTION=0 modification in the IT3System.ini file. If you get “unable to connect to MCI” when connecting to a vehicle most likely these registry settings are not fully correct.
When you now start Techstream with the TSloader make sure the correct interface is selectable (not grayed out) and selected, otherwise re-check the previous setting. Then just connect to vehicle (without actually being connected, just have the MVCI cable connected to the USB port) and you should get no errors but Techstream should eventually (after time out…) come up with a window where you can manually select your vehicle code etc etc.
When I then connected to my RAV4 it connected nicely and I could readout my TPMS sensor ID’s which was my main objective. The interface is flashing green during communication with the vehicle.
So be assured: Techstream can work on a Windows-10 64bit Prof. laptop without the need of a virtual machine.

Sunday, December 29, 2019

Mini vci or Mongoose Techstream Cable to Register Lexus TPMS?

I was searching for a preferred tool for dealing with my TPMS nonsense. Dumbe tire guy broke one while putting on my new tires and are too dumb or do not have the right tool (or both) to unlock the ECU and register the new TPMS module.
I would like to purchase a tool to takes care of this issue as i see it happening again and again.
What is the preferred tool to buy that will do it all (unlock ECU) and do what needs to be done to support our TPMS requirements?

After search on lexus club forum, i find some clues. Here are some real user experience.
Mini VCI J2534 cable
1)
Download techstream and invest in a mini vci OBD-II cable. Best $20 buck I’ve spent and I was able to reprogram the ECU with the new TPMS reg code plus more. You will also need a TPMS scanner to pull the reg code off each sensor, but that is if you already have the sensor inside the tire.
I bought the cable here https://www.obdii365.com/wholesale/mini-vci-for-toyota-with-toyota-tis.html
It works on my 2006 GS. I haven’t tried on my 2013.

2)
I have the exact same mini vci cable and I cannot get it to program my TPMS sensor. I read it could be due to the dongle being on the older firmware not the 2.0.4 firmware and not supporting new protocols. Worked just fine on my 3GS but not my 4GS to program the TPMS. I could read all the data from the car but cannot write any new values.
That’s the exact problem I get and from my research it seems like you need a firmware 2.0.4 cable in order to resolve this problem with newer cars. You cannot unfortunately update the existing cable to that firmware because the newer 2.0.4 cable has additional security hardware in there as well.

3)
I have that exact same cable. You cannot write new TPMS sensor values with that cable on the 4th gen Lexus GS. Worked just fine for me on my 3rd Gen GS. 4th Gen GS requires a different newer cable with additional security hardware on it.


The mangoose JLR/Toyota/Volvo 3-in-1 vci cable 
I read that as well but it seems like firmware 2.0.4 is a hit or miss. I have one more cable on hand. It’s a 3-in-1 Toyota/Volvo/JLR, luckily, I have 2 of the 3 vehicles listed.
http://www.obdii365.com/wholesale/mangoose-jlr-volvo-toyota-scanner.html
mangoose-jlr-vci-cable
I purchase the Autel Maxitpms ts201 scanner. It’s really basic but it tells you the ID code, PSI, temp and battery condition. The best $50, on sale price, spent. I’m going to play with this on my other GS this weekend since Lexus said one of the batteries is low. I want to see how accurate the battery condition is.
autel-tpms-ts201-1

autel-tpms-ts201-2
Good news. The Mongoose Toyota/JLR OBDII will write to the ECU. I can only say this for the 2013 model. I don’t have a later model I could try on. Well shoot. I have my 2019 UX as well.
mangoose-toyota-techstream-tpms-1
mangoose-toyota-techstream-tpms-2

mangoose-toyota-techstream-tpms-3
I tried a couple times with my new set and old set. I reprogram the old set back in.
mangoose-toyota-techstream-tpms-4 

Test result:
Got mine in today and works like a charm.  MIni VCI cable failed to register TPMS on 4th gen GS, but the mongoose cable did it no problem.

Tuesday, August 6, 2019

How to Install Toyota Techstream V14.20.019 for Mini VCI?

Newer version Toyota TIS Techstream 14.20.019 has been tested and verified working great with Mini VCI J2534 cables.


Version: 14.20.019  with older v13.00.022 optional
techstream-v14-20-019-software-1
Compatible device:  Mini VCI cables (SV46-DSV46-D1), Mangoose VCI
Operating system: WinXP/Win7
Language: English Chinese French German Italian Japanese Spanish
techstream-v14-20-019-software-language
How to install Toyota Techstream v14.20.019?
If you use older software 13.00.022, check installation guide here.

Step 1: Install setup
install-techstream-v14-20-019-software-1
Open Techstream _GTS_14.20.019 folder
install-techstream-v14-20-019-software-2

Install Techstream_GTS-14.20.019-NDSI(1)
Select Software language
InstallShield Wizard install
Agree license agreement
install-techstream-v14-20-019-software-3

Enter User name (AADD) and company name (1111), press Next
Press Install
install-techstream-v14-20-019-software-4

Finish install setup successfully.
Click on Finish to exit.
Step 2: Install driver
Open driver folder
install-techstream-v14-20-019-software-5

Install MVCI Driver for Toyota Cable 2.0.1
Press Install
install-techstream-v14-20-019-software-6

Finish install MINI-VCI driver

Step 3: Select VIM
Open Techstream software on desktop
If system prompts Java Runtime message, press No to continue
install-techstream-v14-20-019-software-7

If techstream asks enter activation key, press Cancel
install-techstream-v14-20-019-software-8
Select Setup tab->VIM Select 
install-techstream-v14-20-019-software-9
Select interface as Xhorse MVCI and press OK

Step 4: Activate Techstream 
Open Readme text in Techstream _GTS_14.20.019 folder
install-techstream-v14-20-019-software-10
Paste Techstream.exe”/395070/VM:1
Right click Techstream on desktop and go to Properties 
Replace Target “C:/Program Files/Toyota Diagnostics/Techstream/bin/MainMenu.exe” by “C:/Program Files/Toyota Diagnostics/Techstream/bin/Techstream.exe”/395070/VM:1
install-techstream-v14-20-019-software-11
install-techstream-v14-20-019-software-12

Then press Apply
and OK

Step 5: Install device driver
Connect MINI VCI J2534 cable with computer
Windows will automatically install device driver
install-techstream-v14-20-019-software-13
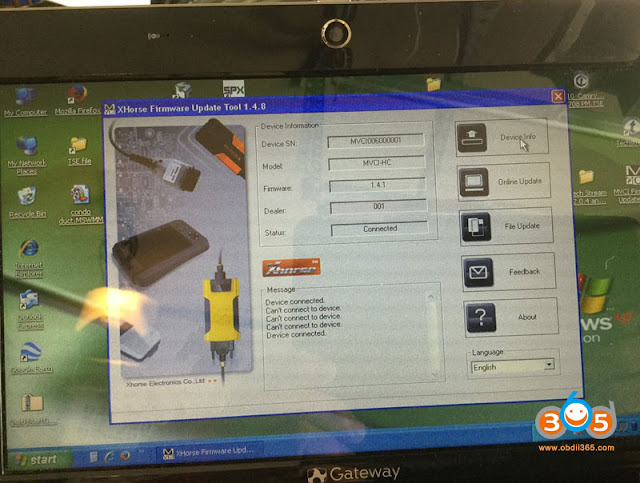
Open MVCI Firmware Update Tool->Device Info to check firmware information, firmware version 1.4.1

Step 6: Run Techstream 
Open Techstream software on desktop
Initializing USB Communication
install-techstream-v14-20-019-software-14
If Techstream gives you TIS Access Error, select Offline Mode to continue
install-techstream-v14-20-019-software-15
Select vehicle information
Techstream Software v14 is ready to use.
install-techstream-v14-20-019-software-16

install-techstream-v14-20-019-software-17

install-techstream-v14-20-019-software-18
Done.

Thursday, June 6, 2019

Free Download Toyota Techstream V14.10.028 Software

Latest version V14.10.020 Toyota TIS Techstream has been tested and verified working on issue by obdii365.com engineer.


Software version: V14.10.028
(Crack version. No Activation)
Operation system: Windows 7 32 bit
Toyota Teschstream 14.10.028 has been tested OK with:

techstream-v14-10-028-software
Free Download Toyota Techstream V14.10.028 Software
How to install Toyota Techstream 14.10.028 software?
Step 1: Install Setup
Open software CD
install-toyota-techstream-v14-10-028-sw-1

Open Techstream_V14.10.028 folder
install-toyota-techstream-v14-10-028-sw-2

Copy and paste Techstream_SetupNA_V14.10.028 to desktop
Run Techstream setup on desktop
install-toyota-techstream-v14-10-028-sw-3

Select setup language
install-toyota-techstream-v14-10-028-sw-4

Install Techstream InstallSheild Wizard
Press Next
Accept license agreement
install-toyota-techstream-v14-10-028-sw-5

Enter customer information, User Name: AADD, Company name: toyota, press Next
install-toyota-techstream-v14-10-028-sw-6

Install the program
install-toyota-techstream-v14-10-028-sw-7

Finish

Step 2: Install driver
install-toyota-techstream-v14-10-028-sw-8

Run MVCI Driver for Toyota-Cable 2.0.1
install-toyota-techstream-v14-10-028-sw-9

Install Mini VCI driver for Toyota TIS, press Next
install-toyota-techstream-v14-10-028-sw-10

Ready to install
install-toyota-techstream-v14-10-028-sw-11

Finish driver installation

Step 3: Crack Techstream
Open Techstream software on the desktop
install-toyota-techstream-v14-10-028-sw-12

If windows gives a Java Runtime error, press No to ignore.
Launch Techstream 14.10.028 software
install-toyota-techstream-v14-10-028-sw-13

If techstream requires a registration key, press Cancel
install-toyota-techstream-v14-10-028-sw-14

Select Setup tab->VIM Select, select interface: Xhorse-MVCI
Open readme.txt on software CD
install-toyota-techstream-v14-10-028-sw-15

Copy Techstream.exe”/395070/VM:1
Right click Techstream Properties on desktop
install-toyota-techstream-v14-10-028-sw-16

install-toyota-techstream-v14-10-028-sw-17

Replace MainMenu.exe by Techstream.exe”/395070/VM:1 in Target area
install-toyota-techstream-v14-10-028-sw-18

Then Apply

Step 4: Install Device Driver
Connect Mini VCI J2534 cable with laptop
install-toyota-techstream-v14-10-028-sw-19

Installing device driver software
install-toyota-techstream-v14-10-028-sw-20

Open MVCI Firmware Update Tool
Read Device Info
Device connected

Step 5: Run Techstream
Open Techstream software on the desktop
Initializing USB communication
install-toyota-techstream-v14-10-028-sw-21

Read vehicle information and confirm
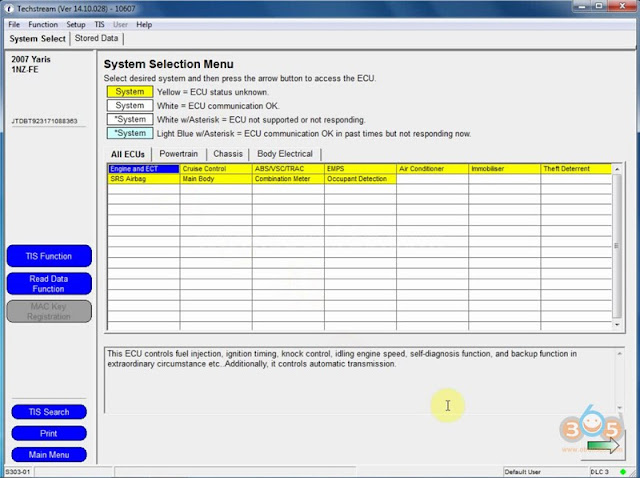
Start diagnose vehicle
install-toyota-techstream-v14-10-028-sw-22

install-toyota-techstream-v14-10-028-sw-23