Tuesday, January 23, 2018

How to solve Mini VCI Toyota Techstream “Software Registration” error

1)
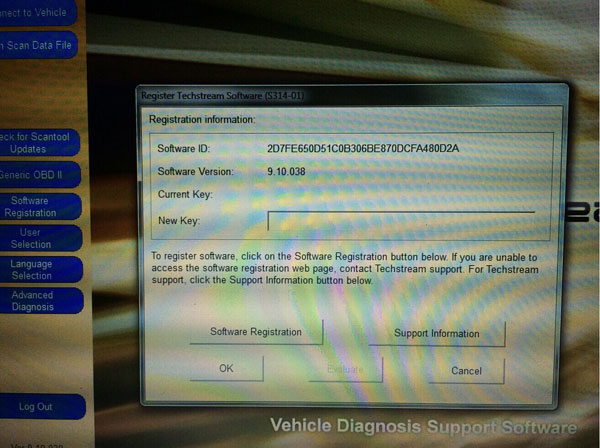
When register Toyota Techstream software (mangoose with new chipTechstream MINI VCI 22pinMINI VCIMangoose VCI), the system pops out the following error message:  “To register software, click on the Software Registration button below. If you are unable to access the software registration web page, contact Techstream support. For Teachstream support, click the Support Information button below”. (shown as picture below)
techstream-Software-Registration
Solution:
Go to
C:\Program Files\Toyota Diagnostics\Techstream\Env\IT3System.ini
Change
TISFunction=1 to TISFunction=0
Save
2)
When access to the Software Registration page, the system pops out an error message:  “Network Connection is unavailable. A network connection is required to use TechStream. You can only connect 25 more times before software registration is required.”
Solution:
Replace the Original MainMenu.exe file in directory
C:\Program Files\Toyota Diagnostics\Techstream\bin\
(Backup your Original file on your computer or Rename it…)
Start your Techstream and enter these Keys to activate your Techstream:
EU = abbe703c18739c897dae24400b78aeb530001302010241
NA = b52a2344103a02cf15fd78cbe5cbc0ab30001302010241
JP = f9db6f52a2df50424270ce506cdd645530001302010241
OTHER = 076125d9a1a47f6a39015e59208499dc30001302010241
For how to activate Toyota Techstream software, please check the video here:
https://www.youtube.com/watch?v=X1uS-rLajKc
NOTE: DO NOT change the “User Type” when you will run your TIS  Techstream for first time! Leave it with the Default option. “Official” Dealer/Repairer with other words…
Hardware ID = 55555555555555555555555555555555
Software ID = 8.00.034
Date Start = 01-02-2013
Days To Expire = 3000

How to install Xhorse MVCI Toyota Techstream on MacBook

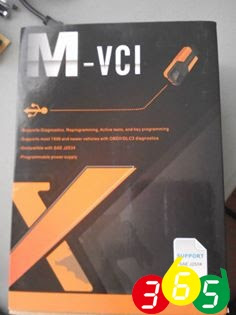
This Xhorse MVCI Toyota Techstream setup is a MackBook Pro with 8 GB RAM running VMware. In the VM I am running Win XP Pro, SP3 to which I have allocated 2 GB. This seemed to be a happy medium to get the VM running at a reasonable speed.

Anyway on further reflection, I decided to do an overview of what I believe to be the logical steps to install MVCI/TS and try not to get too bogged down in the technical minute of the detail.
xhorse-mvci
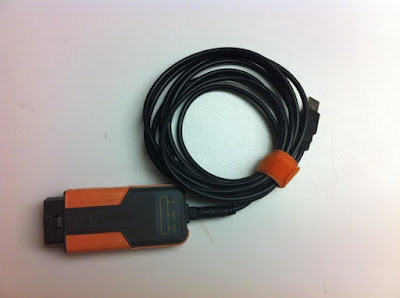
xhorse-mvci-cable
I’ll quickly list the steps, then follow that with an explanation of my logic. So here goes:
  1. Install the Xhorse MVCI driver MSI that came with your cable.
  2. Plug in your MVCI cable. (IIRC you should see some Windows install activity in the bottom right-hand side of the screen.)
  3. Run the X-Horse Firmware Updater Tool and confirm you see all the fields populated with data, including the Firmware version.
  4. Install the TS software that came with your cable.
  5. BEFORE opening TS (big temptation, but resist), open a Finder window and locate C: Program files\Toyota Diagnostics \Techstream\Env
  6. Within this folder locate IT3System.ini and open it in TextEdit.
  7. Scroll down to AVAILABLE FUNCTION SETTING
  8. Switch off the TIS Function by changing TISFunction=1 (or what ever value it is) to TISFunction=0 {i.e. zero}
  9. Click File, and Save.
  10. Now open TS and BEFORE you do anything else, check that the TIS Techstream VIM is NOT selected, but rather the other choice (e. g. XHorse – MVCI VIM) IS selected.
Following these steps should give you a working set up.
Things to bear in mind in order to be useful the MCVI cable need to be connected even when not connected to the car, while that seems obvious, sometime we miss the obvious.
To actually use TS, the other end of the MVCI cable needs to plugged into the OBDII port of you car. Also the car needs to be in at least IG-ON, but most of the time it will need to be in READY.
My sequence to connect is:
  • Boot computer and login.
  • Plug in MVCI into the USB port.
  • Plug in the other end into the OBDII port.
  • Make car READY
  • Launch TS.
  • Press Connect to Vehicle; you may have to answer some questions.
  • Start diagnosing/checking.
RATIONAL FOR MY INSTALL SEQUENCE
Caveat: I have tried both install TS software and then MVCI drivers and also MVCI drivers and then TS software and while I was able to get the software working in both scenarios, I found that the approach I have outlined below was easier with a higher chance of success than doing it the other way. So be aware I’m not saying it won’t work if you install TS first, I just think what I have outlined is easier. Also, doing it this way you can do updates to a newer version easier as you just pick up the process from step 4 and go to the end. YMMV.
  1. Install the MVCI driver MSI that came with your cable. The MSI file is a Microsoft Setup Information file and it is essentially a container type of file (similar concept to ZIP, TAR, RAR files) that contains all the files you need to setup software or drivers. In our case the drivers for the MVCI cable. there is only 1 maybe 2 files that we really need to install, but one of the files is a script that executes a series of Win commands to achieve this. One of the commands is to copy an edited version of a TS file. If the TS file exists already it copies over the top of it to replace it. If it doesn’t exist, it just creates the TS folder and sub-folder structure to copy the TS file into place. This is important to understand because this is the method by which it avoids the necessity to go through the registration process in older versions of TS. Likewise, some packages require the running of TISKEY, they give you a key to enter in the registration screen of TS or they give you a hacked copy of the TS executable to copy over and replace the installed executable. None of this is necessary in this install sequence, because registration is achieved by the editing of the IT3System ini file in steps 4-8.
  2. Plug in your MVCI cable. Windows will now connect the cable with the driver.
  3. Run the X-Horse Firmware Updater Tool and confirm you see all the field populated with data, including the Firmware version. If you can see the cable info, success! If do not connect, you need to pause here and figure out why you cannot connect.
  4. Install the TS software that came with your cable. I found this pretty straightforward, just launch the installer and follow the prompts.
  5. BEFORE opening TS (big temptation, but resist), open a Finder window and locate C: Program files\Toyota Diagnostics \Techstream\Env. Do these next 4 steps, trust me.
  6. Within this folder locate IT3System.ini and open it in TextEdit.
  7. Scroll down to AVAILABLE FUNCTION SETTING
  8. SwitchTIS Function.
  9. Click File, and Save.
  10. Now open TS and BEFORE you do anything else, check that the Toyota TIS Techstream VIM is NOT selected, but rather the other choice (e. g. XHorse – MVCI VIM) IS selected. This ensures TS is looking at your cable.
I have deliberately not put in any detail around troubleshooting if you don’t get the right result at every step. To be honest I cannot anticipate where you might get errors (or why), I have documented (as best I remember) the process I followed and I have a working setup. So I will leave it up to people to ask questions if they strike trouble, and hopefully I or the collective minds can help out.
See also How to set up MVCI Techstream on MacBook by www.obdii365.com

Monday, January 22, 2018

How to choose a OBD Scanner for Toyota Prius Hybrid

Questions before entering the topix:
I’ve been looking around for a scanner that can read all the various Toyota Prius hybrid & ABS codes, since my extended family owns an ’05 with almost 180k, an ’08 with over 200k, and a ’12 plugin with about 68K. Which is the better one to choose?

Following are the Toyota Prius real owner experiences on OBD code scanners:
1)
If you have a laptop the best interface available is the Mini VCI with the Toyota Techstream software. You can find it in the $30 range.

2)
My preferred scanner is a VXDIAG. With SAE J2534 Vxdiag VCX Nano for Toyota Tis Techstream V10.30.029 Compatible.
It is much faster and more reliable than the Mini VCI cables, It uses Techstream just as the Mini VCI.

3)
I used a Mini VCI cable for years.  The cheap Mini VCI uses firmware 1.4.1 . There are more Xhorse made expensive versions out there that have newer firmware 2.0.4.
On my 2006 Prius.
Version 1.4.1 instantly disables the car and reads a bunch of “U” codes. U codes are can bus communication errors. It is the Mini VCI causing the errors.
Version 2.0.4 will connect and read codes.
The VXDIAG uses it’s own firmware. It connects and reads codes much quicker than a Mini VCI cable.

4)
I use an iPhone app called EngineLink that uses a WiFi dongle hooked to the port. The app was a few buck, but I don’t remember. The elm3277 dongle was ~$20 on obdii365.com. On the iPhone, the app can be set up, and there are downloadable PIDs for the Prius so you can monitor all the battery module voltages, temps, whatever you want. I originally bought it to turn off the idiotic internal reverse beep. I use it occasionally to keep an eye on the difference between min and max battery module voltage, which I think is a pretty good indicator of battery health.

5)
+1 on mini VCI cable with hacked Techstream software. Mini VCI with Techstream software. Runs best on Windows XP or Windows 7. Runs about $24.
If you just need to read codes and set some user settings, then Scangauge 2 is also a good choice. With the Scangauge you’ll also be able to leave it hooked up to your OBDII port and read real time (real time enough) data with the user selected gauges and x gauges. Runs $150+


6)
I think the best tool for your requirements is the Mini VCI with Techstream software £22. This gives near dealer level of diagnostics at a very cheap price. It can be made to run on Windows 8.1 using XP virtual machine.
I use an ancient IBM laptop with XP loaded bought for £22, “rather than risk damaging my house machine loaded with Windows 7” and gets over the minor difficulties of getting the program to run on W 7/8.
For purely monitoring purposes I use an ELM327 (bluetooth version) and Priidash (free). This gives a dashboard readout of just about every parameter available, and records HV battery module voltages and other information to a file.

7)
The only problem with Mini VCI is that it will require laptop.
I am mostly on the move and if it happen that I suspect a trouble then I will be keen to know the issue immediately. I am kind of thinking of getting ELM327 first and Android App, this way I can at ease and no time just plug the device and try to read data.
I started with the ELM 327, but wanted the ability to bleed the brakes to change the fluid among other things.
Then one day I was in Birmingham picking up a HID kit from ebay and spotted the mini VCI on sale there. So I bought one. Very pleased with it, the last job I did with it a few days ago was to set the AC compressor not to come on automatically when demisting the windscreen, “something the dealer said could not be done”.
This works on most Toyota’s and will also work on most cars for emission faults that have the standard OBD connector. With adapter connectors it will work on BMW and Mercedes.
The VCI works on all Toyota’s from around 1998 on, not just the Prius. as well as the ELM327 and Torque app works for more than just Toyotas….


8)
The ELM 327 is designed to be an OBD reader engine for emissions DTC’s. There is an international agreement on the standards for these codes and the methods of delivering them for engines, but not transmissions and other items.
The Mini VCI is a Chinese clone of a more expensive device called a Mongoose. This device with Toyota’s Techstream software is what dealers use for reading codes, fault finding, and carrying out service tasks to the range of Toyota cars, covering all aspects not just the engine and emissions. This means it is capable of almost anything that the dealer can do. The dealers in the UK will typically charge £80 to read any trouble codes, more than 3 times the price of buying a Mini VCI.
Scangauge is good for realtime dash monitoring of up to 4 different parameters in the genII, example: I use btv,mpg,rpm,soc.. as far as reading any DTC’s it will only read engine ecu standard codes not the hybrid stuff. For that I’ve been using autoenginuity scan tool & dongle and software, been using that since genI days and now the genII with updated Toyota enhanced interface it also works great for anything. I use it on a 1.2ghz laptop running winXP. Sure wish it would work in linux but that’s a whole nother can of worms..Anyway already got the Toyota enhanced interface and software running then to add another family like FORD, just buy that enhanced interface and they give the key to unlock it. The software contains all NA/EU you merely unlock the different interfaces you purchased. I now have 3 Toyota, Chevy and Ford including the diesels. Handy but must have laptop and pay 475+ for software but once u have it, very easy to add on and superior diagnostics capabilities and data recording. For instance I can record all hv battery module voltages and then played them back later on a spreadsheet chart, or how about mg1 current mg2 current and mg1temp and mg2 temp etc etc.. nice

9)
The best tool for diagnostics is Toyota Techstream (dealer software). Software can be “found” online if you are creative, but you’ll need a $500 Mongoose MFC cable (or Chinese clone) in order to use it. There are a bunch of Scangauge Xgauges defined for the Gen1 Prius, not quite Android user interface, but gives you insight into various Hybrid parameters.
Since my check engine light went on a few weeks ago for my ’02 Prius, I bought a Bluetooth OBDII scanner about $15. It shipped from China, sure, but it works well so far and was dirt cheap compared to most of what you find here. I use is in conjunction with an Android-powered HTC EVO phone. I’ve tried several OBDII programs so far, but Torque is the easiest to use and seems to be the most powerful (as in, full of options I’d be too afraid to play with). It’s both free and premium. I’m using the free version, but I think I’ll be a big spender and pay the $8 for the full version. Suffice to say, Torque and the others I’ve downloaded (all free, btw) seem to offer all the options that those expensive programs I looked at over the web do.
That said, none of these programs offer car-specific settings that I’ve noticed. Especially not a Prius specific interface, which would be ideal. I oddly got a trouble code reading of P2000, which is not in any list of trouble codes anywhere… Best I can tell, it might mean something is problematic in the O2 sensor of the catalytic converter…
Torque-toyota-prius
If you want a code reader that will read not only all the Prius codes, but most other vehicle codes I am afraid your going to need a large bank account to take care of the cost. Although the OBD2 engine codes are supposed to be standard the actual connectors are not, and the coding for other systems “transmission, body, air bags, ect” are very manufacturer, and vehicle specific.
Snap on make a reader for most vehicles at around £2000, $3200, but even then add on units are needed for different manufacturers at extra cost.
The mini VCI will read all the codes for most Toyota vehicles, and engine codes on most other manufacturers cars providing the OBD connector is the same. For those that use different connectors adapters are available cheaply. These are typically for German cars, Mercedes, BMW, but are not limited to those.
You will often find reference here on PC about retailers that will read vehicle codes free of charge, you will also note these readers often give only part of the code, no code or even codes that do not exist. They have also been known to cause problems with the car. This is because they are not scanners specific to the Prius.
This is not just a Prius, or Toyota problem, but a problem with manufacturers using there own individual systems and codes.
I am not saying the VCI is the best reader. I am saying it is the best reader by far at it’s price and above, for a Toyota. If you need a device that will read all codes on most cars be prepared for the cost involved.

10)
I have the ELM327 code reader, and a great piece of equipment it is for extra monitoring on the dash.
I also use the same device with a laptop and the free program “Priidash” that will give virtually every parameter available from the Prius on one screen along with recording of vital information.
The VCI is not the tool for the above capabilities, “apart from recording information”. It does however not only give the ability to read all!! the Prius DTC’s, and sub codes, what they mean, and clear them. It also gives the ability to do all the service tasks, and program any programmable features such as lock timing, lighting, seat belt and reverse beep, register key fobs, and more.
To sum up. Two different pieces of equipment that are capable of different functions with some overlap.

11)
The Mini VCI with Techstream (comes with the VCI) will tell you what the DTC is and guide you to the problem “gives a list of possible causes for the DTC (s)” and will clear it or them.
I have the equipment myself and honestly believe that anyone that has a Toyota particularly a Prius should buy one. One trip to the dealer for DTC reading will pay for the device x4.
Mini VCI Techstream 12.20.024 Feedback on Yaris 2007

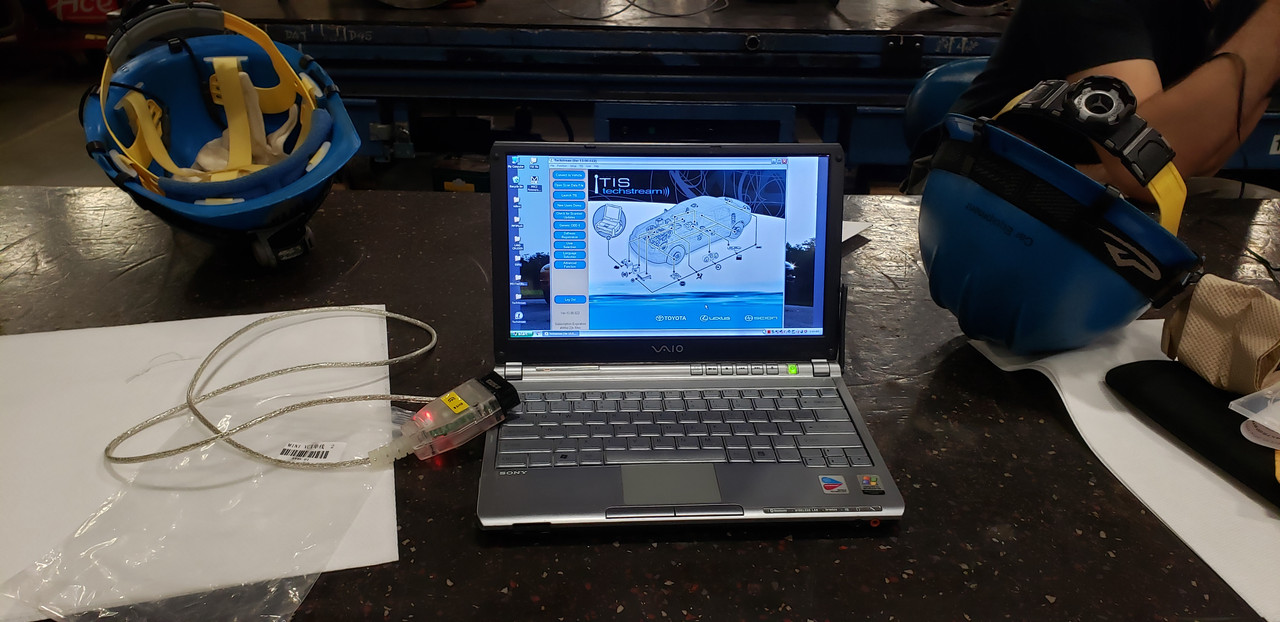
(09/18/2017) Toyota Techstream V12.20.024 is tested without issues on Windows 7 operation system and verified to work like a charm.
version: Techstream V12.20.024 crack
O.S.: Windows 7 32bit
workable devicesMINI VCI cables and Vxdiag Vcx Nano for Toyota
(Software download will be attached a few days later. It’s crack version, does not reuqire activation code)

ECU: TOYOTA Yaris 2007 1NZ-FE
Techstream-tv12.20.024-yaris-2007-ecu
WE ARE TESTING…
_Techstream--12.20.024-download-tested-OK-1
_Techstream--12.20.024-download-tested-OK-2
_Techstream--12.20.024-download-tested-OK-3
_Techstream--12.20.024-download-tested-OK-4
_Techstream--12.20.024-download-tested-OK-5
_Techstream--12.20.024-download-tested-OK-6
_Techstream--12.20.024-download-tested-OK-8
_Techstream--12.20.024-download-tested-OK-9
_Techstream--12.20.024-download-tested-OK-10
_Techstream--12.20.024-download-tested-OK-11
_Techstream--12.20.024-download-tested-OK-12
Tested with MINI VCI (item no.SV46-B/SV46-D)
sv46-d-mini-vci

Tested with Mangoose VCI (item no. SV46-C)
sv46-c-mangoose-vci
vxdiag-vcx-nano-for-toyota
Test result: Toyota Techstream 12.20.024 is tested successfully!!


with Toyota Techstream cables (Mini vci or Mangoose vci), you can customize your car;

with Vxdiag vcx nano Toyota,  you can not only have customization but do programming via WIFI.

Toyota Mini VCI Techstream v11.10.034 Free Download

Free download mini vci software Toyota TIS Techstream v11.10.034 here. With techstream 11.10.034, technicians can better simultaneously read/analyze on-board vehicle data, browse relevant TIS service documents, and reprogram vehicles all from the driver’s seat via wireless connection to TIS.
MINI-VCI-techstream-11.10.034
Free download:
Activation code:
EU : 436c0d33401a3b2a777af0d16518315650001610121430
JP : 3766e7ba2b9e81fff7430fd7b2422e5950001610121430
NA : 441845f1503e4af5645026ec40f7874450001610121430
OT : cd92c2e8d8e89ed6851ec2581e99fde950001610121430
TIS Techstream v10.30.029 (tested, cracked, no pass)

Basic info:
Version: V11.10.034
OS: WinXP, Vista, Windows7
Languages: English, Multilanguge

Compatible device:
Toyota MINI VCI cable
Xhorse MVCI cable

Techstream v11.30.034 release notes:
— Vehicle Coverage (*Added in Current Release TIS V11.10.034)
Support TOYOTA, LEXUS, SCION (-2016) diagnosis requires the diagnosis of PassThru J2534 compatible adapter.
LexusToyotaScion
’17 CT200h*’17 Sienna’17 iM
’17 GX460*’17 Prius V’17 FR-S
’17 RC-F*’17 Prius PHV
’17 Corolla
’17 Yaris H/B
’17 Yaris S/D Mex Prod
’17 Camry*
’17 Camry HV*
’17 Hiace*
’17 Prius C*
’17 Rav4*
’17 Rav4 HV*
’17 Tundra*
Note:
If you download previous version 10.00.028,10.10.018,10.20.030,10.30.029,11.00.017,11.00.019, you can send license ID to our technician Sales@obd365.com, they will help activate the software.
techstream-activation
— Enhancements
Forced Actuator Refresh
(This function occurs during the Air Bleed Utility. The process was redesigned to be more efficient with the amount of fluid used and time spent.)
Applicable Models/Systems:2015 – NX – ABS/VSC/TRAC
System Path:To access the Forced Actuator Refresh Utility:
– ABS/VSC/TRAC / Utility / Air Bleeding

— Software Corrections
This release addresses a number of software bugs. For more details, please refer to the v11.10.034 Known Bugs List. In the event you experience a software anomaly with v11.10.034, please submit an error report using the F12 key. Your feedback will help ensure software quality for future releases.

MINI VCI Techstream 11.10.034 display:
MINI-VCI-techstream-11.10.034-1
MINI-VCI-techstream-11.10.034-2
MINI-VCI-techstream-11.10.034-3