Thursday, March 30, 2023

How to Configure Vediamo with Mini VCI Cable?

 How to configure Vediamo for J2534 Devices (Here mini vci j2534 specifically).

If you do not know what anything in the title means, you probably should not try anything on this post.

Notes:
1. We will not be providing a link to download Vediamo or any J2534 products, just explaining how to configure the program settings in order to connect to your car.
2. Vediamo is a programming software that allows you to edit the code within the different onboard computers.  This post will only focus on configuring a certain cable – Mini VCI J2534 with the program.

3. You are at your own risk. We are not responsible for the damage.

configure Vediamo with Mini VCI Cable

STEP 1.
Get an activated version of Vediamo 4.2. HAS TO BE 4.2 otherwise you will not be able to configure a J2534 device like openport2.0 or MVCI with the program. You can find links to cracked versions on MHHAuto or you can buy a copy on ebay with a keygen for around $10. Not sure how trustworthy ebay is.

We have explained why only Vediamo 4.2 can be used with j2534 and how to configure 4.2 with openport in the previous post.

How to Configure Vediamo with OpenPort 2.0?

STEP2.
Buy a Mini VCI cable. I got mine on for less than $30. Spend as much or as little as you would like in order to make yourself feel comfortable with attaching it to your benz.

STEP3.
Plug in your MVCI and download any necessary drivers. If your computer recognizes it in Device manager as “Serial bus converter” then you do not need to use any install disk that came with the cable. It will be in Device manager – Universal Serial Bus controllers. There should also be another tab in device manager that says “Serial ports” and have your device listed along with “(COM3)”. Make sure it is COM3, otherwise you can right click, go to properties, and change to COM3.

STEP4.
Download Autokent MVCI MultiDriver x64 2.0.1. This can be found online (search our blog), you will have to turn off threat/virus protection in order to get it to work. Go through the install process and run the application as admin. The Splash screen should be a picture of a dude holding a gun with the words “Autokent” across the bottom. When prompted, select 2.0.1 from the dropdown menu and install.

STEP5.
Now comes the configuring part. Open your Vediamo file location (probably C:->ProgamFilesx86->Vediamo.
Then go to Caesar->driver, and right click on “slave”. Go to properties, security tab at the top, edit, add, and then type “everyone” in the box, and select check names on the right side. Then check off the boxes to allow everything. This will allow you to edit the file.

STEP6.
Open the “slave” file, scroll down to the “Part J” section. Under the “Device name:” section. Change whatever is inside the quotes to The name of the autokent driver you previously installed. The name should be “XHorse – MVCI Autokent-X64 – 2.0.1”. But, to be sure, you can find the driver name in Registry editor (Windows button, regedit). The location of the driver may be different, but you can find it by going to HKEY_LOCAL_MACHINE -> SOFTWARE and then doing ctrl+f and searching for “Autokent” and finding the next instance. You can then right click on the folder with that title, click rename, then ctrl+c to copy it exactly and paste it into the part J configuration device name in slave.ini. Save the slave file and close.

STEP7.
Open Vediamo start center, on Vediamo Server, select update. Uncheck all the boxes except for “Part J” and “Pinmapping”. Select Update. If prompted, select the Autokent MVCI driver from the dialog box as your part J. When working correctly, you should have a box that says “Part xxxxx” with some number as the x’s underneath the Vediamo server box.

STEP8.
Select the notepad icon 2 from the left at the tools window on the bottom right of the start center. Select Ecoute options -> format of the variant code string -> change decimal to hex.
Everything should be properly set up now. You will need to have the proper .CBF files (look up vediamodata downloads) and from there you can find youtube videos on the possibilities for working on the computer modules on your car.

IMPORTANT NOTE – When connecting to your vehicle, there will be a tab at the top left that shows a connection icon. It will default to saying “KLine1 Communications”. Right click on this, select properties, and then from the dropdown menu, select CANHS. You will have to do this every time otherwise you will not be able to connect to your car properly.
Wednesday, March 15, 2023

Openport Techstream V15 Review on Corolla

 I order a Tactrix Openport 2.0 clone with gold connector from a well-known Chinese online store (obdii365.com). Toyota techstream V15.30.026 downloaded from Rutracker. 

We put the drivers from the kit with an adapter, then install techstream.
Select vehicle.
Openport Techstream V15 Review on Corolla  1

Openport Techstream V15 Review on Corolla 2


Openport Techstream V15 Review on Corolla  3

Click Health Check and all modules are scanned for availability and errors

Openport Techstream V15 Review on Corolla  4
picture from the last scan, since erasing errors, the mileage is about 300 km
Openport Techstream V15 Review on Corolla  5

with such errors passed the first scan

after returning to the System select tab, it becomes clear which modules are polled and which are not (with *)

Openport Techstream V15 Review on Corolla  6

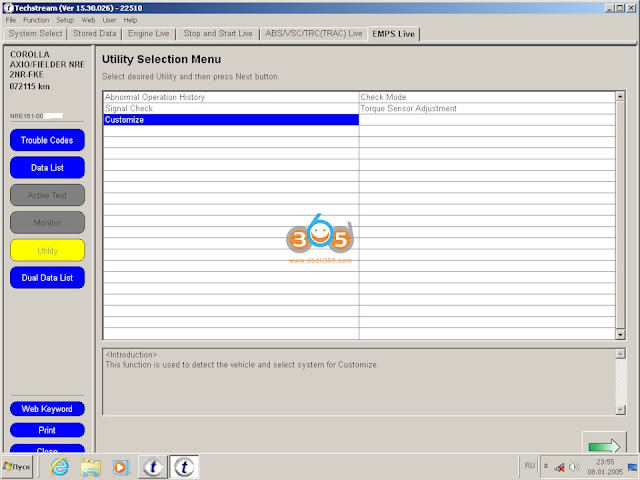
then I reveal the content of Customise, here is what we can customize,
I set myself a consumption in liters per 100 km, so it’s more familiar

You can see a lot of customize setting options, 
disable/enable slide roof open warning
disable/enable key remind sound
disable/enable side seatbelt warning buzzer
disable/enable front passenger side seatbelt warning buzzer
disable/enable tail remin buzzer
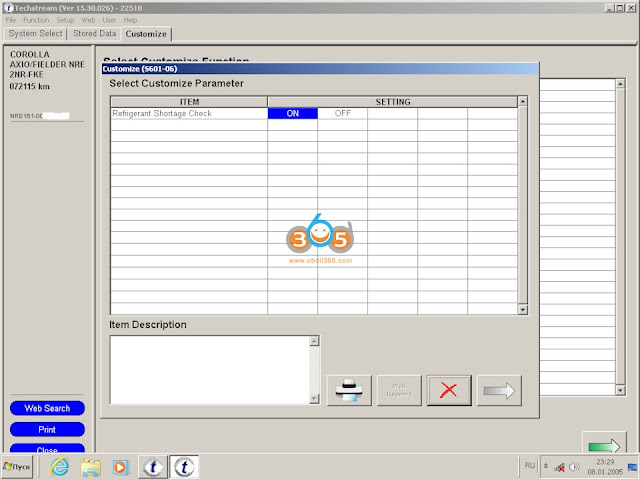
disable/enable refrigerant shortage check
disable/enable ODO display time after IG off setting
disable/enable lighting time
disable/enable I/L when ACC off
disable/enable I/L ON W/Door Key Unlock
and much more. 

Openport Techstream V15 Review on Corolla  7

Openport Techstream V15 Review on Corolla  8

Openport Techstream V15 Review on Corolla  9

Openport Techstream V15 Review on Corolla  10

Openport Techstream V15 Review on Corolla 11

Openport Techstream V15 Review on Corolla 12

Openport Techstream V15 Review on Corolla 13

Openport Techstream V15 Review on Corolla 14

Openport Techstream V15 Review on Corolla 15

Openport Techstream V15 Review on Corolla 16

Openport Techstream V15 Review on Corolla 17

Next Utility is tests or module calibrations

Openport Techstream V15 Review on Corolla 18

Openport Techstream V15 Review on Corolla 19

Openport Techstream V15 Review on Corolla 20

Openport Techstream V15 Review on Corolla 21

Openport Techstream V15 Review on Corolla 22

Openport Techstream V15 Review on Corolla 23

Openport Techstream V15 Review on Corolla 24

Openport Techstream V15 Review on Corolla 25


Mini VCI Techstream Register Toyota Roomy Key

 I got a Toyota Roomy van with one key, the second either remained in Japan.

I’ve been planning to fix this for a long time. And I ordered a key and a mini vci Toyota techstream cable.

Mini VCI Techstream Register Toyota Roomy Key 1

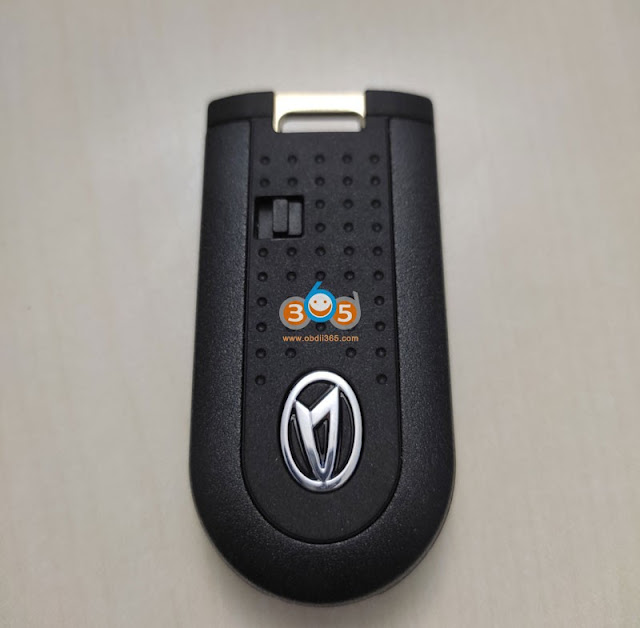
Daihatsu logo key. It was cheaper and more fun.

The key must be new or blank. To register the key you need to prepare a laptop with Techstream installed, a mini VCI cable, an old key and a new key.
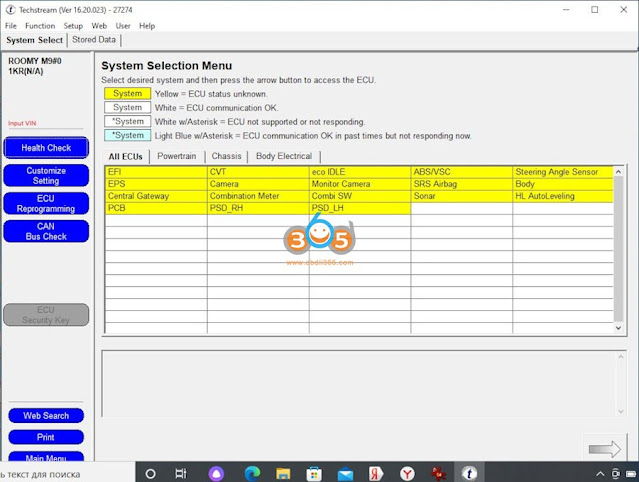
I registered with Techstream version 16.20.023.

Mini VCI Techstream Register Toyota Roomy Key 2

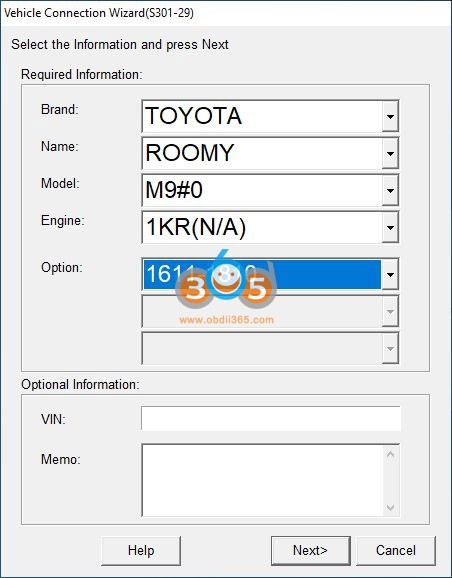
Choosing Roomy
Mini VCI Techstream Register Toyota Roomy Key 3
Select the Body module in the list of units
Mini VCI Techstream Register Toyota Roomy Key 4
Select Utility on the left
Mini VCI Techstream Register Toyota Roomy Key 5
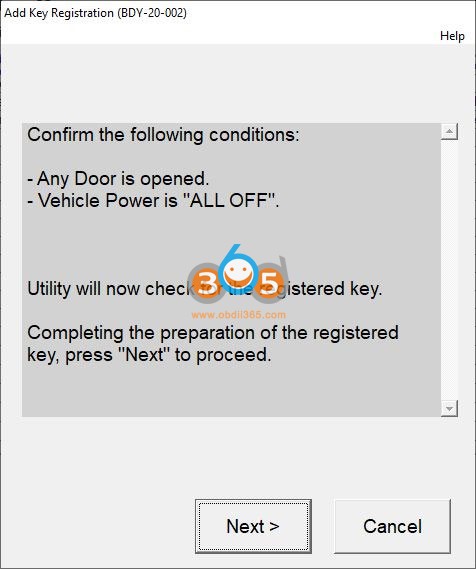
Select Add key registration
Mini VCI Techstream Register Toyota Roomy Key 6
The program offers to open one of the car doors and turn off the car.

Then the program will ask you to bring the old key to the start button – if the central lock clicks ok, then the new key. These operations take 30 seconds. – you need to have the keys in direct access. )

Everything, the new key is registered, it remains only to cut a new physical key on a blank.

Read also:

Monday, March 13, 2023

Free Download Toyota Techstream V11 on VMware

If your Toyota or Lexus car is bellow 2016 year, Techstream V11 is enough.

Here we provide mini vci techstream v11 with keygen and set up on vmware. 

I stayed up all night thinking about how to make this easy on everyone so ended up coming with an idea of virtual machine.

What is a virtual machine?

A virtual machine is a computer file, typically called an image, that behaves like an actual computer. In other words, creating a computer within a computer. It runs in a window, much like any other program, giving the end user the same experience on a virtual machine as they would have on the host operating system itself.

So I found VMWARE as our software to create the virtual machine and later on that night I was able to find windows XP 32bit and tried installing xp in the vmware and turns out to work great, so with that being said I combined AGAIN all the files including vmware, winxp, techstream and its drivers as well

I installed winxp on vmware turned out very well to an extent that when I connected the mvci cable it auto installed the drivers I did not even have to manually install the drivers not sure how it happen it could have happened because at that time my winxp virtual machine had already access to the internet. And might have downloaded the drivers itself.


Below is the link of the file 1.24gb

as usual please dont forget to block vmware to access the internet using windows firewall block these two files both inbound and outbound rules
ProgramFiles(x86)\VMware\VMware Workstation\vmware.exe
ProgramFiles(x86)\VMware\VMware Workstation\vmUpdateLauncher.exe

also when winxp is installed on vmware, u can easily drag files from your host computer to winxp (all them techstream files)

https://mega.nz/#!4tkASS6L!LJWshecwOUNIB8CxQ3_M4O3E7f4BsrGSh-Boe3EIihM

file includes:

Techstream v11 (good for the cars/trucks manufactured upto 08/2016)

Techstream keygen

VMware

VMware keygen (I have extracted about 10 keys in notepad)

Windows xp sp3 iso

32bit and 64-bit drivers for MVCI cable

software for checking your cable version.

Please do check the instruction included in the download and installation will be a breeze I have also included screenshot of vmmachine to make it configured right so that usb devices are detected these pictures will make more sense of what I am trying to say

Free Download Toyota Techstream V11 on VMware 1

Free Download Toyota Techstream V11 on VMware 2


Wednesday, March 1, 2023

Download Driver for Mini-VCI J2534 on Win 10 x64 bit

 I recently purchased a Mini-VCI J2534 cable from obdii365 for future car improvements.


Although the site was listed version 18. I do not need this program, just for information.

I encountered such a problem that in the disk "MVCI Driver for TOYOTA.msi" the driver was only for 32-bit Windows OS, and I have Windows 10, x64 bit installed on my laptop.

I searched for a driver on the Internet for a long time and came across one, where he left a link to the desired driver and thanks to him for that!
mini vci j2534 driver

Download "Mini-VCI-Setup.exe" and run, the installation is standard. After installation, this cord appeared in the MMCodingWriter settings and connected to the car without any problems.