Tuesday, February 7, 2023

Register 2015 Toyota Tacoma Key with Mini VCI Techstream

 I was able to successfully program a combo remote and flip key fob to work on my 2015 Toyota Tacoma. It unlocks, locks, and starts!


Below are the exact steps with links and pictures as best as possible for programming steps.

There are 4 primary steps to getting this to work.

1. Ordering the correct key.
2. Cutting the key.
3. Programming the key.
4. Coding the key.


Let’s begin.

Step 1 – Ordering the correct key.

When it came to ordering the correct key, there were tons and tons of comments and forums throwing out all sorts of suggestions. You can buy remote on ebay:

like this one

Register 2015 Toyota Tacoma Key with Mini VCI Techstream 1

New Remote Key GQ43VT20T for 2011-2017 Toyota Tacoma Tundra FLIP key G CHIP

The key features I was looking for was a combination key and fob to lessen down the bulk in my pockets. Flip out was a nice feature but wasn’t necessary. This particular key is pretty good quality and definitely doesn’t feel cheap in any way. The flip out motion is very satisfying as with the button clicks. Critical is that the key is a G chip key as that is what is stamped on the original 2015 Tacoma keys. That code correlates to the ECU transponder which I’ll tackle in the 4th step.


Step 2 – Cutting the key.

For this step, I just went to my local locksmith that also did automotive keys. A regular locksmith could have cut it but sometimes their machines do not have large enough openings to receive a key fob. So to not run into that issue, I went straight to an automotive locksmith. I didn’t get any issues from them in cutting it. He did mention that after market keys tend to be a bit thicker than OEM ones but he was able to get it to cut. I verified that it turned my ignition and worked immediately after.

Step 3 – Programming the key.

This step teaches the remote to control the locks and alarm system on your car. To program my key, I followed the exact steps below and it worked like a charm.

1. Start with the key out of the ignition, drivers door is open all others closed and drivers door is unlocked.
2. Perform these steps within 5 seconds.

A. Insert the key into the ignition(Do NOT Turn) Pull key out.
B. Insert the key into the ignition(Do NOT Turn) Pull key out.

3. Perform these steps within 40 seconds.

A. Close then open the drivers door.
B. Close then open the drivers door.
C. Insert the key into the ignition(Do NOT Turn) Pull key out.

4. Perform these steps within 40 seconds.

A. Close then open the drivers door.
B. Close then open the drivers door.
C. Insert the key into ignition and leave it in ignition.
D. Close the drivers door.
E. Turn the ignition to ON (Do NOT Start) then back to OFF.
F. Remove the key from the ignition.

5. Within 3 seconds, the power door locks should lock then unlock automatically indicating successful entry into programming mode. Return to step 1 if the locks do not cycle at this point.
6. Perform these steps within 40 seconds.

A. Press the lock and unlock buttons on the remote simultaneously for 1.5 seconds.
B. Immediately after letting go of the lock and unlock buttons, Press the lock button by itself and hold for 2 seconds. Within 3 seconds, the door locks should lock and then unlock once indicating successful programming. If the door locks cycle twice, repeat steps A and B in step 6 as the remote was not accepted.
C. Repeat steps A and B in step 6 for each new remote.

7. Open drivers door.

That part is pretty straight forward.

Step 4 – Coding the key.

This step matches your car’s ECU immobilizer to the transponder code in your key so that your new key can start the engine. This step gave me a bit of some hiccups but with some further sleuthing I was able to figure it out. You will need to order an OBD2 diagnostic cable and run TIS Techstream on a laptop in order for this last part to work. It’s not as complicated as it seems.

Firstly, I ordered this mini vci cable:

https://www.obdii365.com/wholesale/2018-new-mini-vci-cable-for-toyota.html

He will provide you with access to a working version of Techstream to use. He sends you a link to download a zip file which seems sketchy but it all worked out for me.


Inside you will find a video file that goes over how to install the program and drivers for the cable. It is critical you follow his steps for Techstream to work.

His steps are as follows (copy and pasted):
Step 1: Run “Techstream_Setup.exe” to install it, after installation completed, one shortcut named ‘Techstream’ will appears on desktop, Modify its name to “Techstream Setup”.
Step 2: Please install the cable driver for 64 Win, “(64 bit Windows) Mini VCI Driver for TOYOTA.exe”.
Step 3: Run “Techstream Setup” to set up ‘Techstream’. Menu “Setup”-“VIM Select”, Select “XHorse-MVCI” for “Interface setup”, click “OK” to continue. (Very important step)
Step 4: Run Techstream to diagnose and setup your car. Copy the shortcut “Techstream Patch 64bit” to desktop, always double click the shortcut “Techstream Patch 64bit” to run ‘Techstream’. No registration key is required.

With these four basic steps and the walkthrough video I was able to get the program up and running. (Please note: I did have to pause my computer’s virus protection in order to accomplish step 2 in the list above)

Now to actually code the key within the program. I followed this YouTube video and it worked for the most part.

Troubleshooting:
I did run into one issue at this point in the process.


Register 2015 Toyota Tacoma Key with Mini VCI Techstream 2

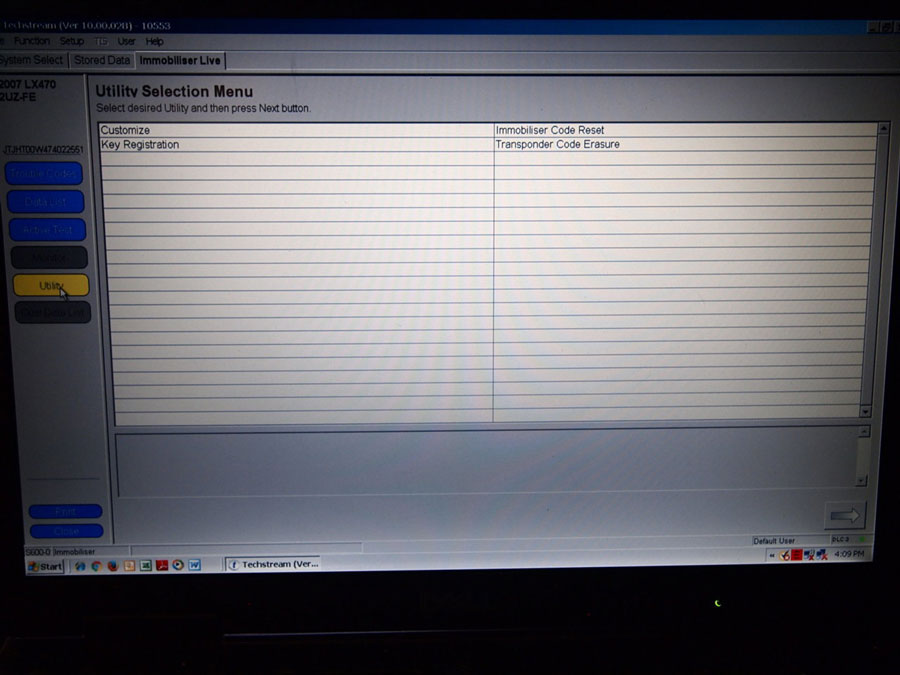
If you get this message, I was able to read on some Lexus forums (they also use Techstream), that this may be cause by the maximum number of allowable coded keys are already coded. To get around this you must run the “Transponder Code Erasure” tool.

Register 2015 Toyota Tacoma Key with Mini VCI Techstream 3

This tool does what it says. It erases all keys that your car is currently remembering except for the one you use in the process. It is critical to use one of your currently functioning keys to do this. Once complete, you can then run the “Key Registration” to program your new key fob and any an additional key if you have one.

All done.

After that I had a new working combination fob and key. I’m already super pleased with the smaller key chain in my pocket. In total, the key cost me $39 with shipping, cutting the key was another $5 and ordering the mini vci cable was $32.99 after tax. So for $77, I now have a new fully functioning key and if I want another it’ll only cost me $44 to get a blank fob and to have it cut.

I hope this helps someone else figure out their process.  I can only verify that this works on my 2015 Toyota Tacoma TRD Off Road DCSB. I do not own any other model years to try this out on.

Monday, February 6, 2023

Mini VCI or VXDIAG to Program TPMS ID?

 Here is the working solution for cannot program Toyota Tacomas (3rd Gen 2016+) TPMS IDs in Techstream.


Example: 2020 Toyota Tacoma/2022 Tacoma.

The solution should be fine with other newer Toyota models as well.


Background:

I recently installed a 3″ lift, and naturally, got bigger tires (285/70/17) and new wheels. After a month long, painstaking experience with my local 4WP shop, I opted to not let them work on my truck and decided to do everything myself (minus the alignment and tire mount/balance).

One of the many problems I had with 4WP, including waiting 4 days for my tires to be mounted and balanced, was that I had asked them to scan the new TPMS sensors that they installed so I could program the ECU w/techstream. I was told that’s not how the TPMS (system) works and that “the truck will learn the TPMS sensor IDs itself”. As a former diesel mechanic, I knew this to be bullshit, despite my very limited interaction w/the TPMS. This issue is what would be solely responsible for the rabbit hole that I would be diving down…that and my spitefulness.

So. Now begins the fun. I found the model of the TPMS sensors that 4WP installed (Oro-Tek PDQ) and purchased a scanner/programmer that was compatible w/them (ATEQ VT37). Now, this part isn’t technically needed if you were able to obtain the sensor ID’s from the physical sensor itself or by asking a COMPETENT tire shop to write them down for you when they mount/balance.


Which Techstream Cable to use?

Mini VCI or VXDIAG to Program TPMS ID 1

I then, like many others, purchased a Mini VCI cableIt’s just a cable right? Ha. No.

So I install the drivers for the cable and select the appropriate VIM on techsteam. I then connect to my truck via techstream and noticed that the vehicle information doesn’t auto-populate like on the Mac/Volvo/Hino/Mitsu software I’ve used in the past. So, I manually inputted it, not thinking much of it.

Mini VCI or VXDIAG to Program TPMS ID 2

I then go into the Tire Pressure Monitoring System and open the Utility to program the new TPMS sensor IDs input the IDs which I scanned off the sensors…and get this error:

Mini VCI or VXDIAG to Program TPMS ID 3

At this point, I tried changing and reverting other settings from within techstream. They all worked fine. I then tried 3-4 other releases of techstream from their blog. Still won’t work. After a crap ton of searching I saw the TSB about jumping pins on the OBDII plug, but noticed that one of the spots didn’t even have a pin in it, so that was useless. I saw a few “your cable is bad” comments and several “I tried multiple of the same Mini-VCI cables” responses.

I then found someone who had posted something about a “VXDIAG VCX Nano Toyota cable” claiming that it worked for them. I then found a VCX Nano for Toyota (it appears each manufacturer has it’s own model) on obdii365.com for $95. I figured if this is what it costs to have something that actually works then I’ll try it.

It arrived today and I once again found myself installing drivers and setting the VIM to what I now see as “Toyota J2534”. This is beginning to look promising. I launch techstream and connect the truck and the first thing I notice is that it has auto-populated my VIN, model code, and vehicle spec. It also loaded much faster than the Mini-VCI cable.

Mini VCI or VXDIAG to Program TPMS ID 4

Jump over to the TPMS menu again, try changing the sensor IDs and…

Mini VCI or VXDIAG to Program TPMS ID 5

Well hot dang…it actually worked. Proof below if you need more convincing to spend the money on a better cable:

Mini VCI or VXDIAG to Program TPMS ID 6

Mini VCI or VXDIAG to Program TPMS ID 7

As you can see, using a very scientific numbering scheme for my new sensors, it worked.

Morale of the story. I spent way too much time and money, purely out of spite for my local 4WP shop and for the future of tire changing freedom. But I hope that this post will help someone else who is struggling to figure out why they cannot program their TPMS sensor IDs with techstream.

Total cost:

$95 for the VCX Nano
$153.67 for the VT37
$32.99 for the Mini-VCI cable

So yea, less than $300 purely out of spite/anger. But I’m also slowly gathering everything I need to do my own tire installs and alignments. And like I said, you don’t necessarily NEED the TPMS programmer/scanner. The important thing in that list is the VCX Nano Techstream cable. Without it, you will not be able to program the TPMS ECU (at least w/3rd gens). Don’t waste your money on the Mini-VCI. There are other brands out there as well, but from my research, they were far more expensive. The other option is to buy a $300+ TPMS programmer/scanner that comes with an OBDII cable. Should be able to program everything there.


The link to the VXDiag Drivers/Software has both V16 and V17. Also, I don’t recommend installing it on a computer you use everyday. You’ll need to disable the windows virus protection or it’ll delete files it marks as malware. I use an old lenovo thinkpad that I had bought on eBay 2 years ago for use in my garage.

You can probably get away with a scanner that just reads the IDs, or see if a tire shop can scan them for you real quick and write them down. They’re a simple 7 digit hexadecimal code. You’ll need to know the sensor brand before you buy a programmer, as not all programmers are compatible with all brands (such as the Autel programmers). However, as just a scanner tool, I believe all scanners can read any sensor. I could be wrong, but they all work off the same frequency (315mhz) so I don’t see why not. Also, reprogramming the physical sensors only works on reprogrammable sensors. It will not work on OEM ones. So, you don’t necessarily need to drop $150 on the VT37. I bought it because I plan on doing all of my own tire/alignment work in the future because I don’t trust most of the shops in my area and the good ones are always backed up.

Wednesday, February 1, 2023

Mini VCI TOYOTA Techstream V18.00.008 Free Download

 TOYOTA TIS Techstream V18.00.008 (02/2023) diagnostic software crack was tested working fine. The software can be downloaded free here.


Version: Techstream V18.00.008

Release Date: 02/2023

Region: All regions
Type: Diagnostic tool Software
OS: WinXP, Vista, Windows7, WIN8, WIN10, Win11 32bit & 64bit

Language: English, German, French, Spanish, Italian, Russian, Chinese, Turkish.

Vehicle coverage: 1996-2022 Toyota Lexus

Compatible devices: VXDIAG VCX NANO Toyota (don’t need MVCI driver), Mongoose pro, Openport 2.0, SM2 Pro, Godiag j2534, Mini VCI J2534 Item #SV46-DSV46-D1

Mini VCI TOYOTA Techstream V18.00.008 Free Download

Free download Techstream 18.00.008 software incl. loader

Free download techstream 18.00.008 setup here

https://disk.yandex.ru/d/_RosgIIDNM9vrQ

Download drivers & patch here

https://mega.nz/file/TvBXGKpD#BE-KXfkz_S6EeqZRGNtINdfQRMcQhIEw9psQd1UJ5oM

it contains older version 17.30.011, driver and patch.

Mini VCI TOYOTA Techstream V18.00.008 Free Download  2

Mini VCI TOYOTA Techstream V18.00.008 Free Download  3

Include:

  • Techstream v18.00.008 setup.exe
  • Patch 32bit & 64bit
  • Drivers.rar (MINI VCI driver 32bit & 64bit, VXDIAG driver and Godiag  j2534/VNCI NANO driver)


How to install:

Run Techstream v18.00.008.setup

Select setup language

Accept license agreement

Install Techstream software InstallShield Wizard

Randomly input the customer user name and password

Wait until setup installation is completed.

Then install driver 32x or 64x bit

Finally run software from patch

Tuesday, December 20, 2022

Mini VCI Techstream Register Toyota Corolla 2007 4D Key

 Car model: Toyota Corolla 2007

Chip type: 4D67 chip required (correct transponder), like this

Remote control: for the central lock at 433Mhz

Mini VCI Techstream Register Toyota Corolla 2007 4D Key 1

Techstream cable: Mini VCI Techstream J2534 cable

Mini VCI Techstream Register Toyota Corolla 2007 4D Key 2

Strictly speaking, an orange adapter is enough to program the transponder, for example, this one:

Mini VCI Techstream Register Toyota Corolla 2007 4D Key 3

It is much cheaper and easier, but if you want to play diagnosis in the feature, you can take the mini vci cable.

You can get a complete key with all the fillings, including a battery, like this

Mini VCI Techstream Register Toyota Corolla 2007 4D Key 4

I draw your attention to the fact that the key blade is TOY43.
Those who just need a spare key can go down this path.
Well, a flip key, of course:

Mini VCI Techstream Register Toyota Corolla 2007 4D Key 5

A simple key came first, we proceed to program the central locking buttons using the “2 Lock – 3 Unlock” method:
The driver’s door is open and the key is removed from the ignition.
Within 40 seconds:
Within 5 seconds: Insert the key into the ignition switch twice and then remove it.
Close and open the driver’s door twice.
Insert the key into the ignition switch and then remove it.
Within 40 seconds:
Close and open the driver’s door twice.
Insert the key into the ignition lock.
Close the driver’s door.
Within 40 seconds:
Turn the ignition on and off once to program a new key and keep the old codes, or twice to program a new key and clear the old codes.
Remove the key.
Within 5 seconds:
The system should lock and unlock the doors once or twice, depending on the selected mode.
Within 45 seconds:
Press and hold the “Lock” [1] and “Unlock” [2] buttons on the key at the same time for 1 to 1.5 seconds.
Press and hold the “Lock” button [1] or the “Unlock” button [2] for 3 seconds.
Within 5 seconds:
The system should lock and unlock the doors once.
If the system locks and unlocks the doors twice, the programming procedure has not been completed. Repeat the procedure with the button.
Repeat the procedures to program the remaining keys.
To exit programming mode: Open any door.
The method is working, if it doesn’t work out, try again, I succeeded the second time.

If you are already a happy owner of MVCI, then it’s easier to do it through Techstream.


To program the transponder, you need to install Techstream on a laptop and the drivers for cable that came with it. The network says that the software contains a certain file that is defined as a virus, but it is not, for this the seller asks to turn off the anti-virus program. In this regard, everything that you will do next, you do at your own risk.


Got version V17.00.023 installed.

Mini VCI Techstream Register Toyota Corolla 2007 4D Key 6

We do everything according to the instructions and, after successfully checking the connection of the computer with the cable, we go to the car. We connect the interface to the car,  start Techstream, and an interface should appear with a choice of car equipment.

In my case, I saw my 4zzfe, set TMUK TMMT Product, – 0706 (the date of release of the car until 2007, 06 months), and click Next.

Mini VCI Techstream Register Toyota Corolla 2007 4D Key 7

Mini VCI Techstream Register Toyota Corolla 2007 4D Key 8

In the window that opens, on the left, click the Utility button, then Immobilizer, then Transponder Code Registration and see something like “Welcome to transponder code registration”.

Mini VCI Techstream Register Toyota Corolla 2007 4D Key 9

Mini VCI Techstream Register Toyota Corolla 2007 4D Key 10

Mini VCI Techstream Register Toyota Corolla 2007 4D Key 11

Mini VCI Techstream Register Toyota Corolla 2007 4D Key 12

Mini VCI Techstream Register Toyota Corolla 2007 4D Key 13

Click Next and …
1 step out of 3 (timeout – 120 seconds):
– remove the key from the ignition;
– insert the key back into the ignition;
– turn on the ignition (do not turn the starter!).
Mini VCI Techstream Register Toyota Corolla 2007 4D Key 14

Step 2 of 3 (timeout – 20 sec.):
– remove the master key from the ignition and click Next.

Step 3 out of 3 (timeout – 10 seconds):
– insert the key you want to program (do not turn on the ignition in any case, just insert it into the lock) and click Next.

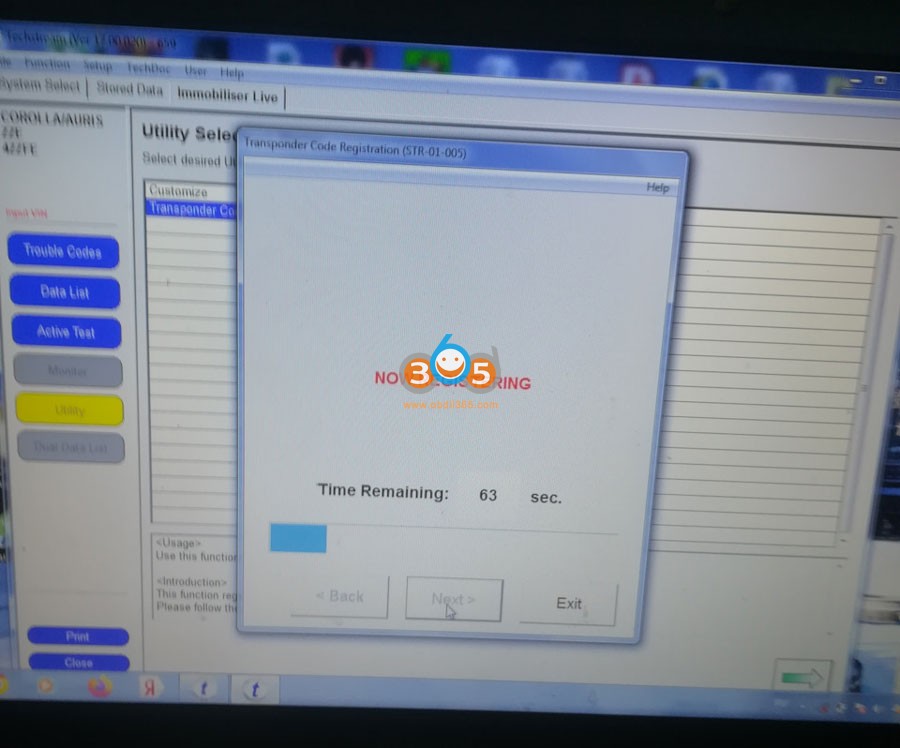
Key registration will start, lasting 60-75 seconds.

Mini VCI Techstream Register Toyota Corolla 2007 4D Key 15

At the end of the registration, exit the program, or register the next key.

Mini VCI Techstream Register Toyota Corolla 2007 4D Key 16

You can check that the key has registered by the immobilizer light – it should go out if the key is in the ignition.
That’s all, the key registration is completed. If the blade is already cut, we start the car.
For the sake of which everything was started.
Mini VCI Techstream Register Toyota Corolla 2007 4D Key 17

We disassemble the Ebay copy of the native key. Unlike the native one, there are 4 buttons in the Chinese CZ module. When all buttons are pressed, the module reacts with a red LED. The machine only responds to the open/close buttons. The signal reception range is not worse than native, as it seemed to me. After breaking out the side inner wall, the chip is easily removed.
Mini VCI Techstream Register Toyota Corolla 2007 4D Key 18

We disassemble the flip key. It has a place for a transponder, the place for the central locking module is indicated by partitions. We assemble, check how the blade opens, how the buttons are pressed, cut the blade, start the car with a new key and enjoy the result. 
Mini VCI Techstream Register Toyota Corolla 2007 4D Key 19
What is the cost of this event: a copy key, a mini vci cable, a flip keys, cutting a blade, as well as a couple of free evenings and the pleasure of the work done.
PS: the key did not fit into the sharpening machine, I had to disassemble it.
To disassemble, carefully knock out the pin.
Mini VCI Techstream Register Toyota Corolla 2007 4D Key 20

Thursday, December 15, 2022

Toyota Techstream vs Subaru SSM4

I installed Subaru SSM4 the other day (Toyota's equivalent of Techstream, their dealer tool) to see what was different between the dealer tools. Although there isn't much difference of the capabilities, ie. sensor monitoring, customization, key reprogramming - but I noticed a few differences between them that I didn't see in Techstream previously.
1. Techstream has explanations on customizations and utility tests whereas SSM4 has none.
2. SSM4 has a few additional customizations on the body control which isn't present in Techstream (see image below).
3. SSM4 selects by model year, or mini revisions from A to H. You should be able to see your revision on the sticker near the passenger door hinge.
4. You are able to view the calibration IDs/numbers of mostly each components (window control, ABS, combination meter, etc). IIRC in Techstream you were only able to view calibration IDs of the ECU and ABS/VDC.
5. Both tools are unable to reprogram calibrations, SSM4 spits out a generic error.

On the additional settings I have tried so far:

1. Destination setting: not sure what it does, but it cannot be changed (generic error)
2. MT/AT setting: no difference.
3. SUBARU/Toyota setting: the backlight on the LCD screen of the electronic aircon control turns off when the AC is off (AC OFF button pressed) for Subaru. For Toyota it remains on. Other than that - no other difference which I can tell.
4. Remote control starter setting: generic error, cannot be changed.

Tested on a Japanese 2015 MT GT86.
Toyota Techstream vs Subaru SSM4


Wednesday, December 14, 2022

Mini VCI Toyota Techstream V17.30.011 Free Download

TOYOTA TIS Techstream V17.30.011 (11/2022) diagnostic software was tested working fine. The software can be downloaded free here. It is crack version with loader, does not require activation. 


Version: Techstream V17.30.011

Release Date: 11/2022

Region: All regions
Type: Diagnostic tool Software
OS: WinXP, Vista, Windows7, WIN8, WIN10, Win11 32bit & 64bit

Language: English, German, French, Spanish, Italian, Russian, Chinese, Turkish.

Vehicle coverage: 1996-2022 Toyota Lexus

Compatible devices: VXDIAG VCX NANO Toyota (don’t need MVCI driver), Mongoose pro, Openport 2.0, SM2 Pro, Godiag j2534, Mini VCI J2534 Item #SV46-DSV46-D1

Mini VCI Toyota Techstream V17.30.011 Free Download 1


Free download Techstream 17.30.011 software incl. loader

Techstream Setup v17.230.011.exe  & patch

https://mega.nz/file/xxU1ACTT#gEDHjgmnVvJ5FEm1m74sjdi7M6fN4V1Dc8AkwgbQzZ4


Include:

  • Techstream v17.30.011 with Loader (11.2022).exe
  • Patch 32bit & 64bit
  • Drivers.rar (MINI VCI driver 32bit & 64bit, VXDIAG driver and Godiag  j2534 driver)


How to install:

Run Techstream v17.30.011.setup

Select setup language

Accept license agreement

Install Techstream software InstallShield Wizard

Randomly input the customer user name and password

Wait until setup installation is completed.


Mini VCI Toyota Techstream V17.30.011 Free Download 2

Mini VCI Toyota Techstream V17.30.011 Free Download 3

Mini VCI Toyota Techstream V17.30.011 Free Download 4

Mini VCI Toyota Techstream V17.30.011 Free Download 5

Mini VCI Toyota Techstream V17.30.011 Free Download 6

Mini VCI Toyota Techstream V17.30.011 Free Download 7

Then install driver 32x or 64x bit

Finnaly run software from patch